Step 1 Form the rocket tube.
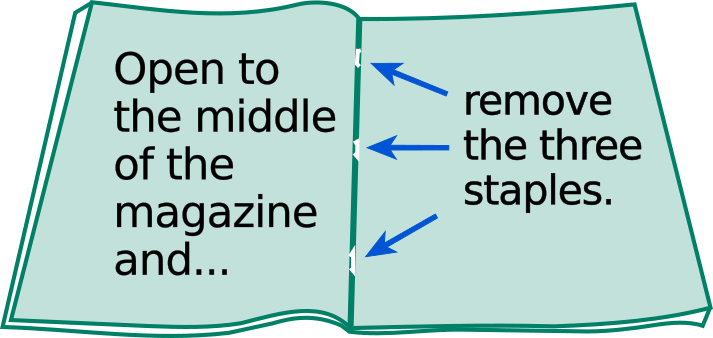
Open up a magazine or catalog to to the middle where the staple curls over. With a finger nail or knife, straighten it so it's easier to pull out. From the outside -- again with fingernail or knife -- pull the staples out.
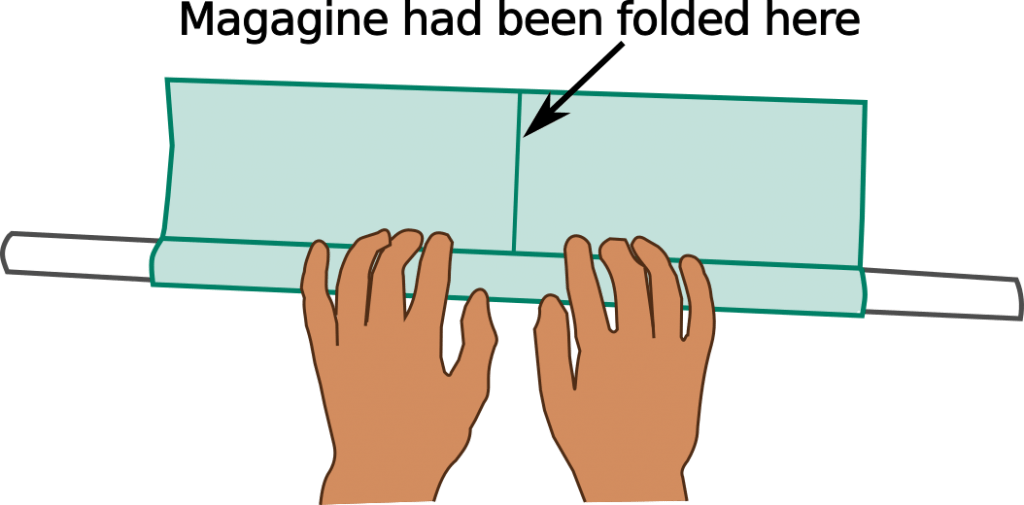
With two of the sheets evenly together, roll them on the forming pipe. Of the two ways you could wrap the paper, wrap it the way that makes the longest tube.
The sheets should be wrapped tightly. If they are mushy, re-roll them.

Tape all along the seam to keep it from un-wrapping. You now have a rocket body.
Although we have taped the outside seam, sometimes --after extended use-- the inside seam can shift or the corner of the magazine catch when you try to mount it on the launcher.
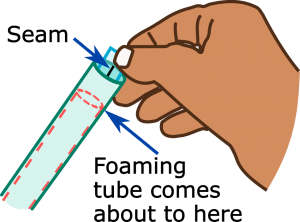 The solution is easy. Slide the rocket body so that about half an inch is beyond the end of the forming tube (shown as a pink dashed "hidden" line in the illustration). Now you can see the end of the inside seam (black in the illustration). With a piece of tape (light blue) about an inch long, stick about half on the inside seam and fold the rest over to stick on the outside. When you put fins on the rocket next step, put them on this end.
Print out the fin patterns. (for both US letter size and A4) Check the printed paper to make sure it did not re-scale the size of the pattern. Some browsers and PDF viewers change the scale and the size of the printed pattern. Choose the print options that say something like "Actual Size" or "Scale: 100%."
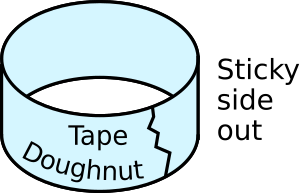
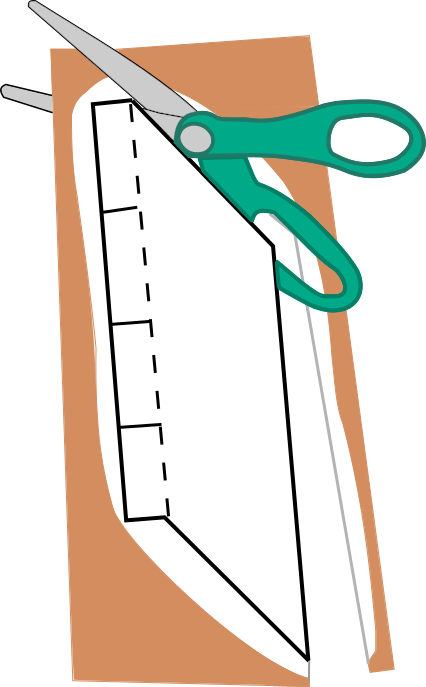
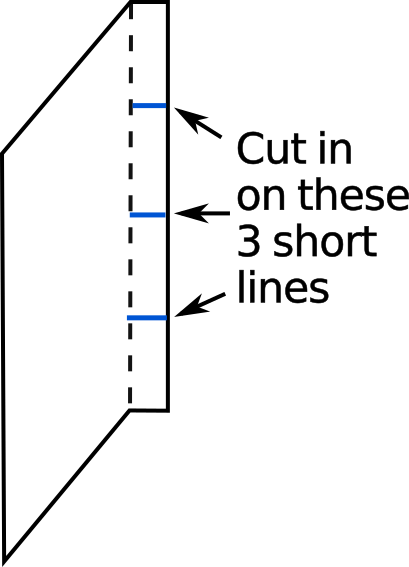
Rough cut out two patterns and use tape "donuts" on the back to stick them onto milk carton or cereal box cardboard. Cut out the outline. In the illustration the rough-cut pattern is white on the orange cardboard. Notice that in addition to the outline being solid, there are also 3 short, solid lines going into the fin. Cut those, too, stopping at the dashed line.
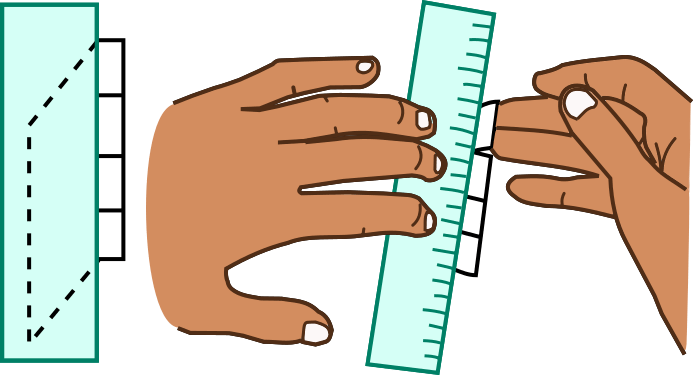 When the cutting is done, fold on the dashed line. You can do this by putting a straight-edge exactly on top of the dashed line and pulling the tabs up, as shown in the illustration. Or line up the dashed line with a sharp corner and bend it.
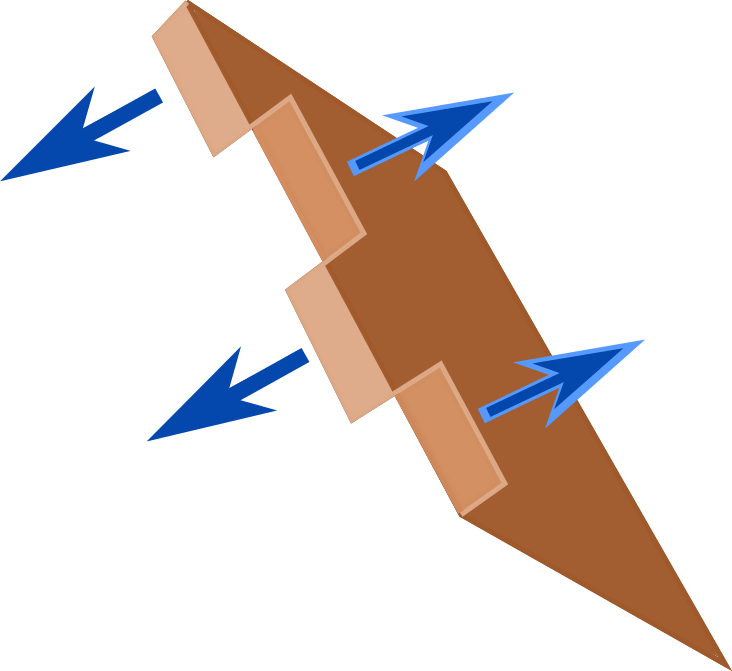 Next bend two of the tabs the other way so they alternate in direction. These bent tabs --known as "flanges"-- will allow you to tape the fin on each side to the body, so it will be stronger.
 Finally, tape the fins onto the end of the rocket tube -- the end that you taped at the end of step 1. Line up the fin with the end of the rocket, as shown in the illustration. Actually, it's three illustrations of the rocket being rotated clockwise to show the fin from several angles. The outer edge of the otherwise brown fin is pink, as a reference point.
 Use two pieces of tape about 3" long-- one on each side of the fin. Notice in the other illustrations on the right that the tape (the outline of it shown as light blue) extends above and below the flanges. The tape end for the lowest flange will fold right into the inside of the tube. Press the tape on hard.Tape on the other fin on the opposite side.
 Finally, bending the bottom of the fins a bit will make the rocket spin, making it more flight stable. The illustrations omit the flanges to concentrate on the bends. Notice that when viewing the close fin edgewise, the other fin appears to be bending the other way. But if you turn the rocket tube so the far fin in now close, the bend is going the same way as the other fin was.
Step 3 Close off the top.
We have to close off the top of the rocket so the blast of air from the launcher will be trapped, pushing the rocket up. I used block off the end with tape only, but that wasn't strong enough and there were leaks. Now I fold over the paper end of the first, then tape.  Start by sliding the rocket to the other end of the forming tube so that 1/2" of the paper tube sticks out past.
- Again, in the illustration (1) the forming pipe appears as a dashed hidden line.
- With your thumb, push over part of the paper.
- Then push on the other side and push over the paper there.
- Now there are two peaks left. Fold those over one at a time, too.
Now when we tape the top, the paper at the end will give it sufficient strength.
Step 4 Make a soft nose cone.
We will make a rounded, soft nose cone for safety and efficiency. At subsonic speeds (less than about 750 miles per hour) a rounded nose cone slices through the air more efficiently than a pointed one. And of course a rounded front is safer. The softness of the nose will make it safer, too, and absorb some of the shock as the rocket hits the ground so the rocket tube doesn't get too banged up. It only takes a minute. 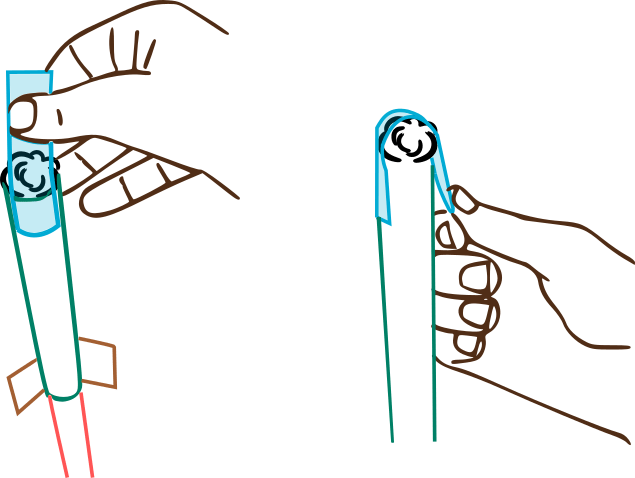 Tear off a piece of clear plastic food wrap about 6" or so long and crumple it up. With a piece of tape about 4" long, tape the ball of plastic (yellow in the illustrations) to the top of the rocket, as shown. The tape (blue in the illustration) will form an upside down"U" with the middle curving around the top of the crumpled ball and the ends taped to the rocket tube. Apply another piece of tape perpendicular to the first. It might not be a perfect dome, but it is an approximation.
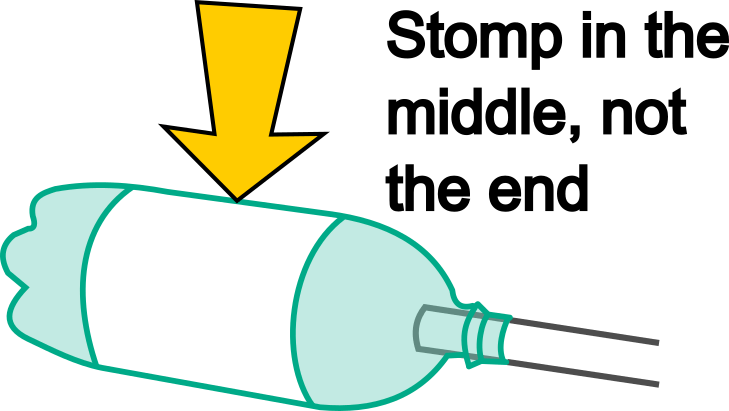 To launch a rocket slide it onto the vertical pipe-- all the way down. When everyone is clear, count down and stomp really hard on the middle of the soda bottle with one foot. Do not stomp on the end of the soda bottle because that will crack the bottle.
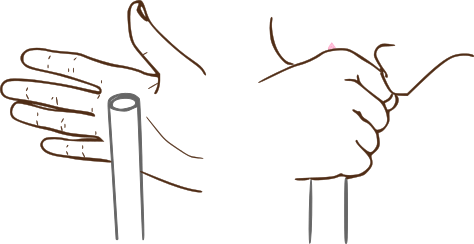 You'll need to blow up the bottle again before sliding the rocket onto the launcher for another launch. The only place you can do that is the opening at the top of the vertical pipe. Rather than put your your mouth directly on the pipe, make a fist around it and blow into your fist. You can make an air-tight seal. If people don't stomp on the end of the soda bottle it can easily last over 50 launches before needing to be replaced. You'll know when it finally does need to be replaced. Either it will be cracked so you won't be able to re-inflate the bottle, or it will be so crinkled that it won't inflate all the way. For instructions to make a quick bottle change adapter out of a melted bottle cap, click here. Here is Erik Herman's design in which you pump up an air reservoir instead of stomping.